A minimal viable Light Rail for Auckland

A version of this article was published on the Greater Auckland Website.

Background

In late January 2022 the government announced that it was building a $15 billion light rail line from the Airport to the City Center via Mount Roskill. The line would be tunneled for about half it’s length.

The response from the Transport community was not positive. The price tag was extremely high especially on a per-kilometre basis for what it delivered. The likely result seemed to be further years of planning before cancellation when a pro-road National Government is elected.

This article will cover one alternative. It is a fairly low cost surface light-rail line that can be built quickly and expanded later.

What does Minimum Viable mean?

A Minimum Viable Product is a product (such as a website, store or app) that can be built cheaply and quickly but does enough to be useful. It is intended to get the idea to real customers and be built on later.

The Minimum Viable Light rail is similar:

  • Cheap and quick to build
  • Is in a useful location and worthwhile to build
  • Is designed to expanded soon after being built

Overview of the alternative line

The idea of the line was sparked by this twitter thread:

” The very original musings by AT for LR had a Stage 1 which simply ran from Wynyard to Eden Terrace. Something similar could be brought back to serve a large, master-planned renewal project around the Dom Rd Junction. ”

Tweet by ScootFoundation

My expansion on Scoot’s proposal would be a short version of the street level Light Rail line originally proposed by Auckland Transport. It would be cover just 3.3 kilometres from The Civic Corner to Eden Quarter along Queen Street and Dominion Road.

The system is a simple two-line surface running light rail. In the inner section (north of Mayoral Drive) it would run on two reserved centre lanes at street level allowing pedestrians to easily cross. Further out in areas of lower pedestrian volume the lanes would be raised or fenced to discourage traffic further and allow higher speeds. In the innermost sections cars would be limited while in the outer sections they would have a lane on each side of the road but parking would be largely removed.

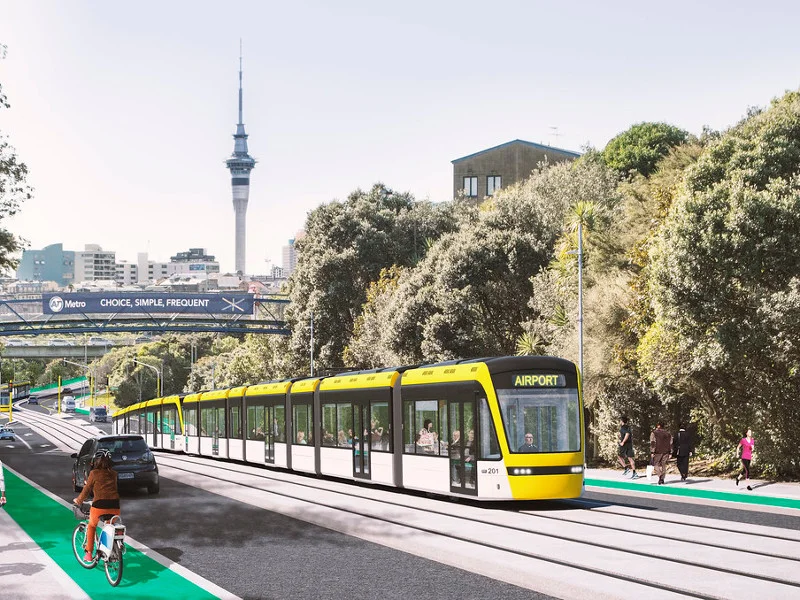
Vehicles would be 33 metre low floor (or 70% low floor) vehicles like the CAF Urbos 3. Overhead power would be used.

A 5 unit CAF Urbos 3.

The Route

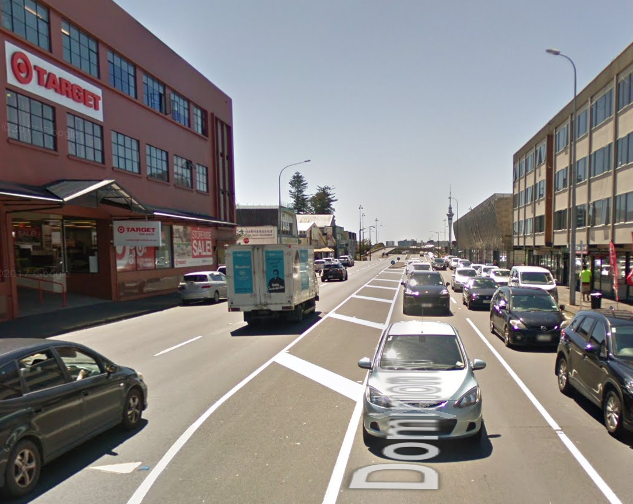
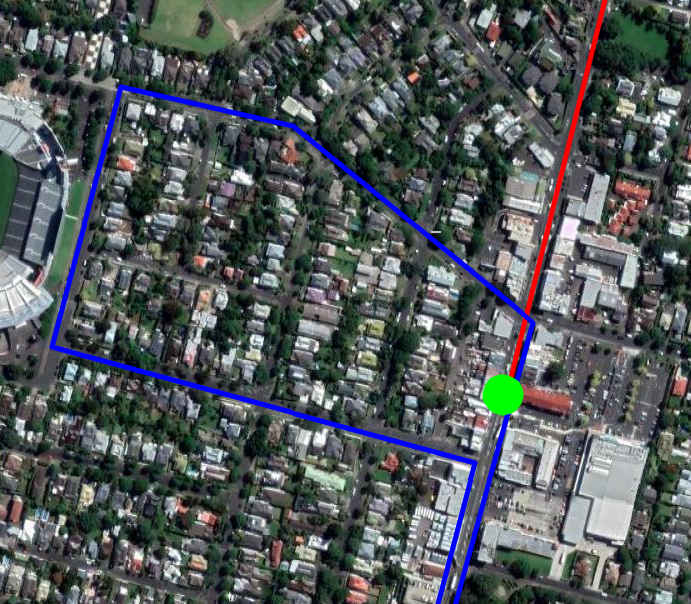
The line would start at the Civic Corner (near Te Wai o Horotiu rail station and Aotea Square) and run south to Dominion Road to the Eden Quarter shopping area between Bellwood Avenue and Valley Road.

Route with Stations

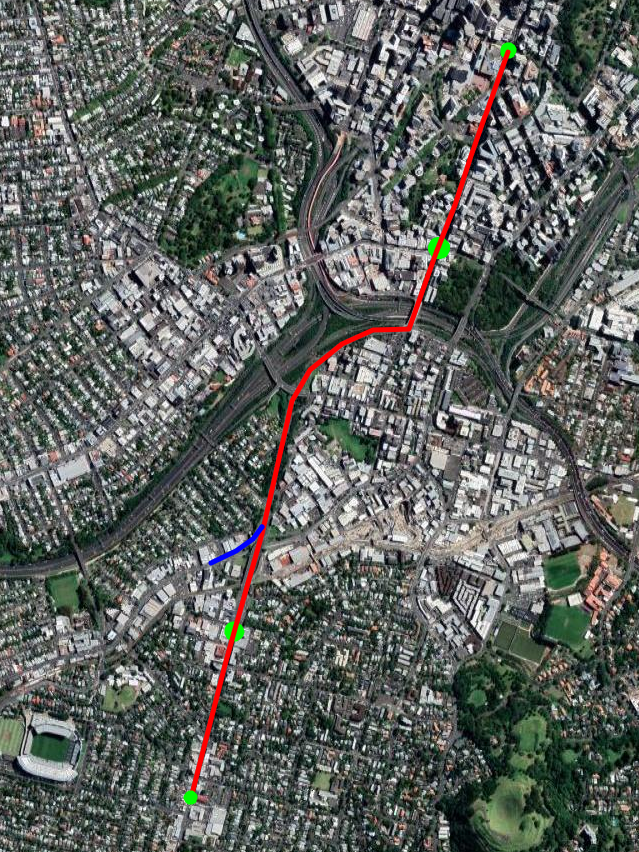
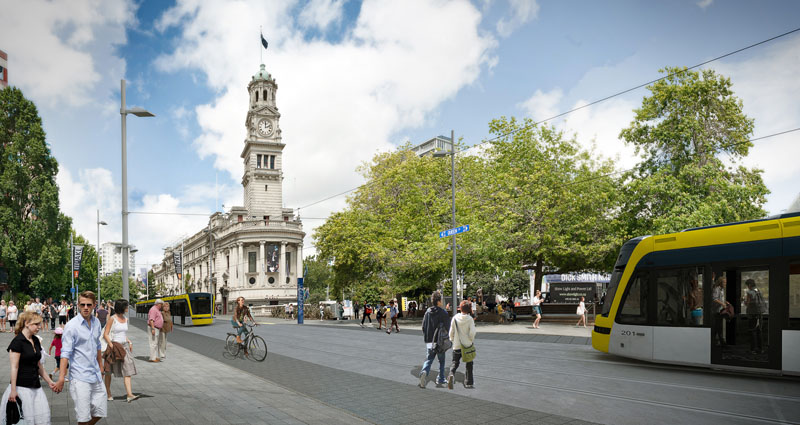
The Civic Corner is where the current Dominion Road buses terminate so it would be the same destination for most current riders (except those going to the Universities). Stopping the line here would also avoid the heavily built up northern 800 metres of Queen Street where there will be conflicts with local merchants.

Just South of the Civic Corner Stop

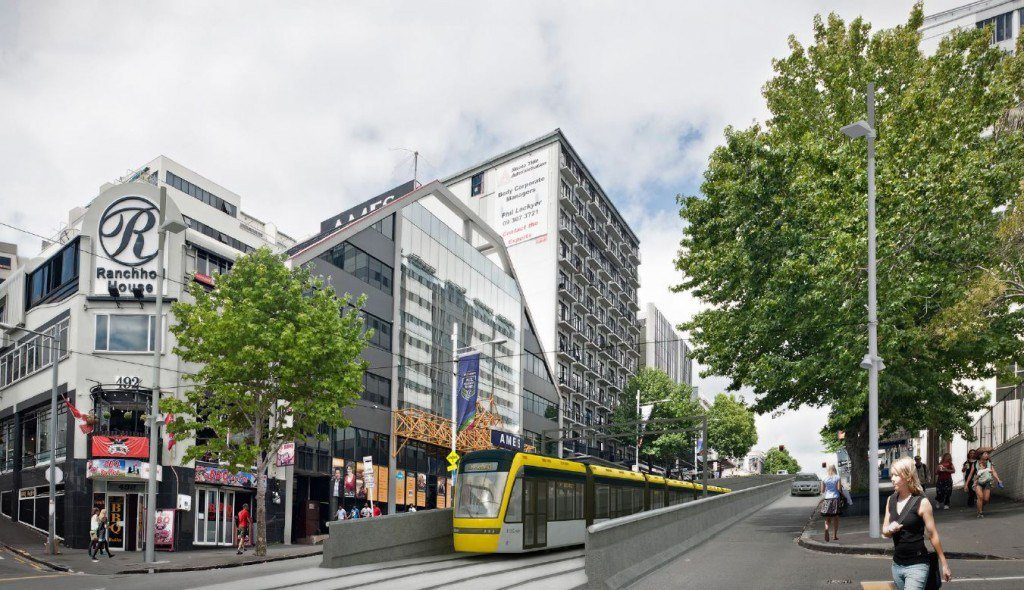
The line would go south across Mayoral Drive and then climb up Queen Street. At some point up the hill it would in into a tunnel under Karangahape Road. There would be a stop near here. This could be on one side of the tunnel or perhaps even inside it.

A train goes through the short tunnel under Karangahape Road

The line would then continue along Upper Queen Street before turning into Ian McKinnon Drive and following it to Dominion Road. Along this section we should future-proof the line for a future branch along New North Road.

Heading up Ian McKinnon Drive

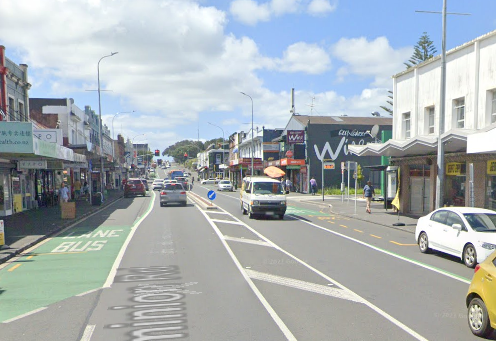
The next stop of the line would be on Dominion Road near View Road. This area is a mix of offices, light industry, apartments and houses and is ripe for increased density.

The rough location of the View Road Stop

The line would then continue south down the hill, across Walters/Valley Road and terminating before it reaches Bellwood Avenue at the Eden Quarter stop. This stop would be placed to allow passengers to easily transfer to and from Dominion Road buses. It is also a short walk to Eden Park.

The location of the Eden Valley stop

At the final stop the driver would walk to the other end of the train for the return journey.

Operation

Making the conservative assumptions that each train averages 15 km/h in the inner city section and 30km/h in the other sections with a wait of 30 seconds at each stop we get the following travel times:

Stop nameDistance
from Civic
Average
Speed
Travel Time
Civic0mn/aDepart 00:00
Karangahape Road800m15 km/hArrive 03:15
Depart 03:45
View Road2600m30 km/hArrive 07:20
Depart 07:50
Eden Quarter3230m30 km/hArrive 09:00

This would be an average speed of 21km/h which possibly could be increased, especially along the Southern sections where there are fewer conflicts with pedestrians and cars.

Assuming we allocate 2 minutes at each end for turnaround then each vehicle would takes just 22 minutes to completed the whole route. This means that just five vehicles should be able to maintain a headway (interval between trains) of 5 minutes in both directions.

Line Capacity with a train every 5 minutes and using 33m light rail cars carrying 210 people (as in the Auckland light rail proposed) would be 2500 passengers/hour in each direction. This comfortably exceeds what the current double-decker buses carried in peak mornings during 2019.

The line should be designed to allow two cars per train bringing length to 66m. If these were brought in and headway was reduced to three minutes then capacity would be 8400 passengers/hour.

Buses coming towards to the city would drop off passengers at a stop just before Bellwood Avenue. They then turn left down Bellwood Avenue to Eden Park and then return along Walters Road before making a right-hand turn back into Dominion Road and stopping to pick up passengers before heading south.

Route for Dominion Road buses

Currently buses at peak hour take 11 minutes via Queen Street and 18 minutes via Mount Eden Road and Symonds Street, so this would save time for most passengers even with the transfer between bus and light rail.

Service Facility

The line would need a small service facility for vehicle storage and maintenance. This would eventually be replaced when the line is extended but would be needed to serve the initial fleet.

A property would need to be purchased and built. Probably near View Road although there are other options such as public land on Ian McKinnon Drive.

Building it.

Total distance would be just 3.3 kilometres which should be build-able for perhaps $NZ 300m including around seven vehicles. The cost of nearly $100m/kilometre reflects the fairly short line in a built-up area but is actually quite conservative. Costs of similar systems overseas are usually less.

In his original twitter thread Scoot suggested a price of $100m and that a large part of the cost could be covered by a special rate on developments in the area.

Construction should be possible in 3-4 years especially with best practice of working 12+ hours per day. A comparison might be the 5.5km Lund Tramway which was build for ~$NZ 250m in 3.5 years.

Future Extensions

Extensions should be planned as soon as possible to allow a continuous stream of work. I plan to detail these in a later article but they could include:

  • North along Queen Street to Customs Street. Probably with a stop around Wyndham Street – 750m
  • North-East from Queen/Customs to Wynyard Quarter. 1-1.5km
  • South on Dominion Road to State Highway 20 – 4km
  • South along New North Road and Sandringham Road as far as SH20 – 5km
  • A replacement maintenance facility will also need to be built. Probably near SH20
  • Further extensions south of SH20.

Questions

Q: What about the Airport and Mangere?

A: We should not try and serve these areas with the same line as the Dominion and Sandringham Road. Instead a high capacity Light Metro line though Mangere Town Centre, Onehunga, Manukau Road, Newmarket could serve them, See Matthew Beardsworth’s article If we’re going to tunnel light rail, do it right! .

Q: What about going to Britomart?

A: Britomart would be the natural place to terminate the line. However I think there will be strong opposition to any disruption from the local business owners that would delay the project. Building the line only as far North as the Civic Corner avoids the most heavily built-up shopping stretch of Queen Street.

However I think the link to Britomart should be a priority and should be built as soon as possible. Building it later avoids it delaying the initial build of the line.

Q: Won’t this line eventually fill up?

A: The line should handle several times the peak 2019 Dominion Road and Sandringham Road demand. If demand eventually exceeds that then there are options ranging from lengthening the vehicles to building new lines to take demand ( eg along Mount Eden Road). Part of the problem with the government’s current proposal is one line is expected to cover all requirements.

Q: Won’t this reduce car capacity into the CBD?

A: Yes it will. But currently there are only 900 people in 800 cars using Dominion Road during the peak hour (less in Queen Street) . The initial capacity of the Light rail will be 3 times that. Also the line will reduce the numbers of buses going into the CBD.

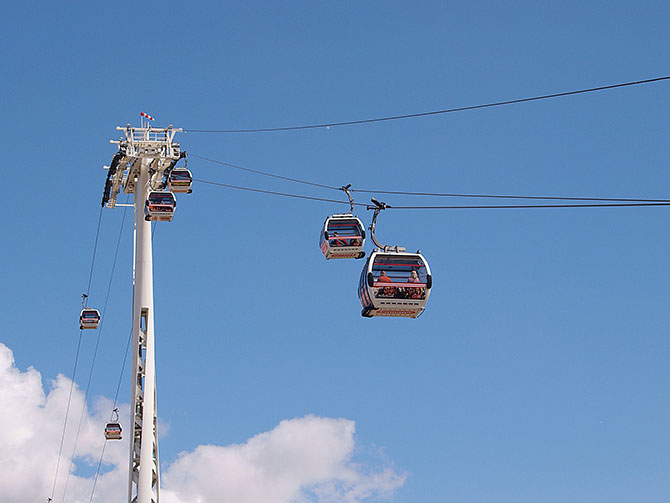
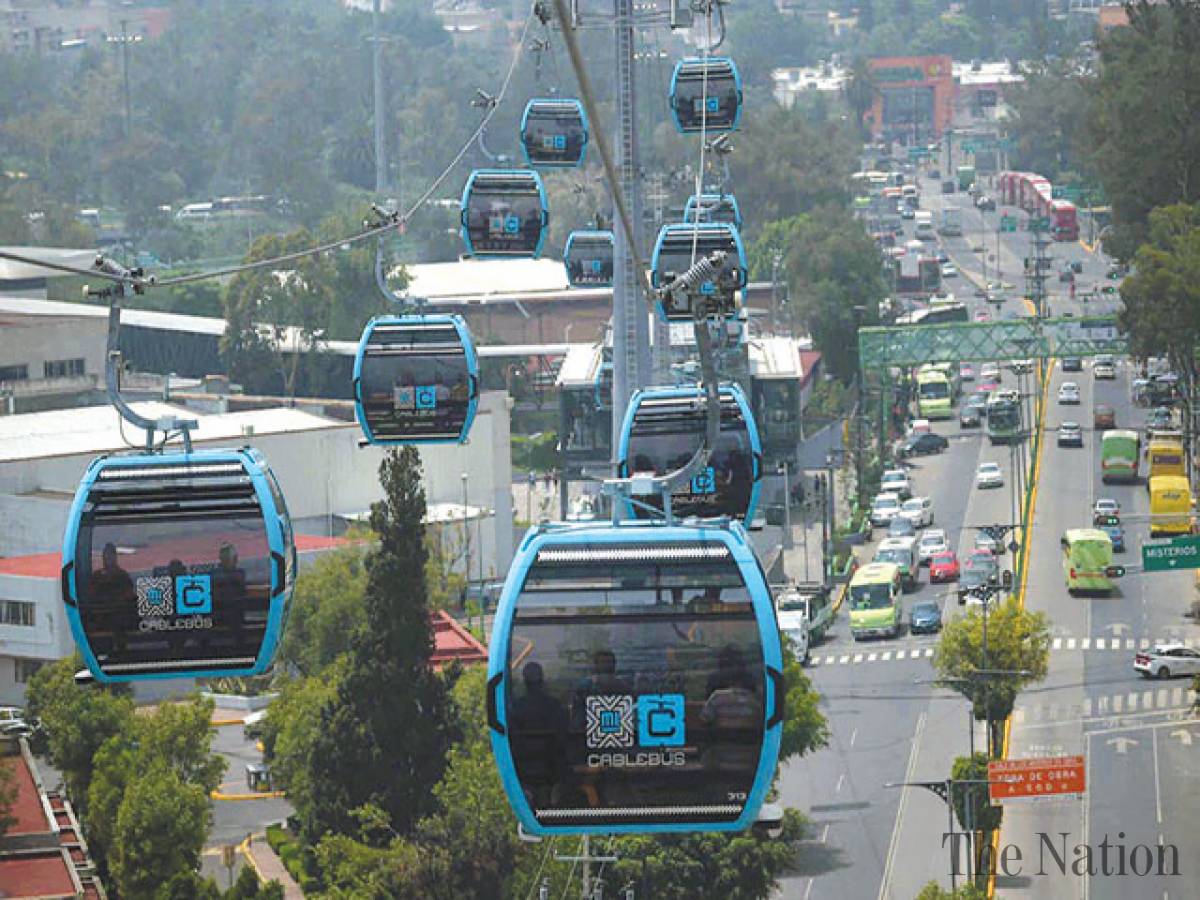
Q: Would the overhead lines be unsightly?

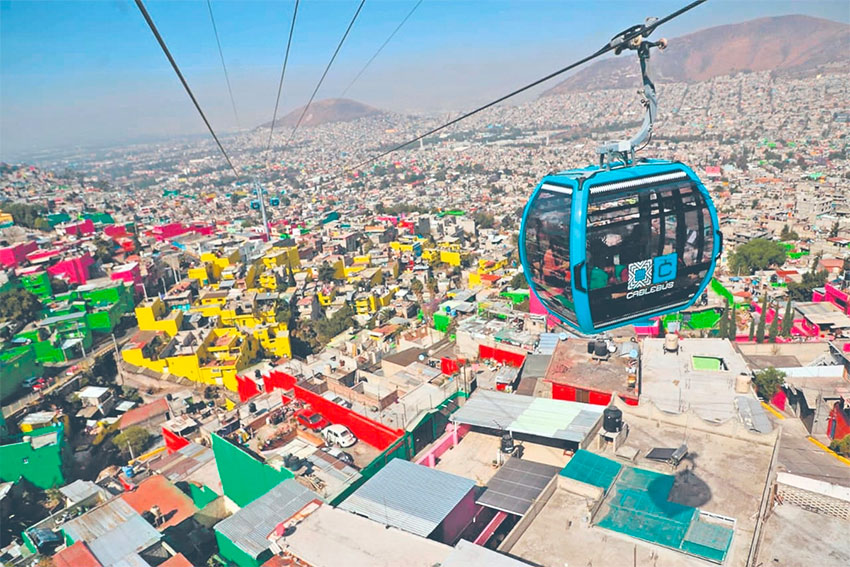
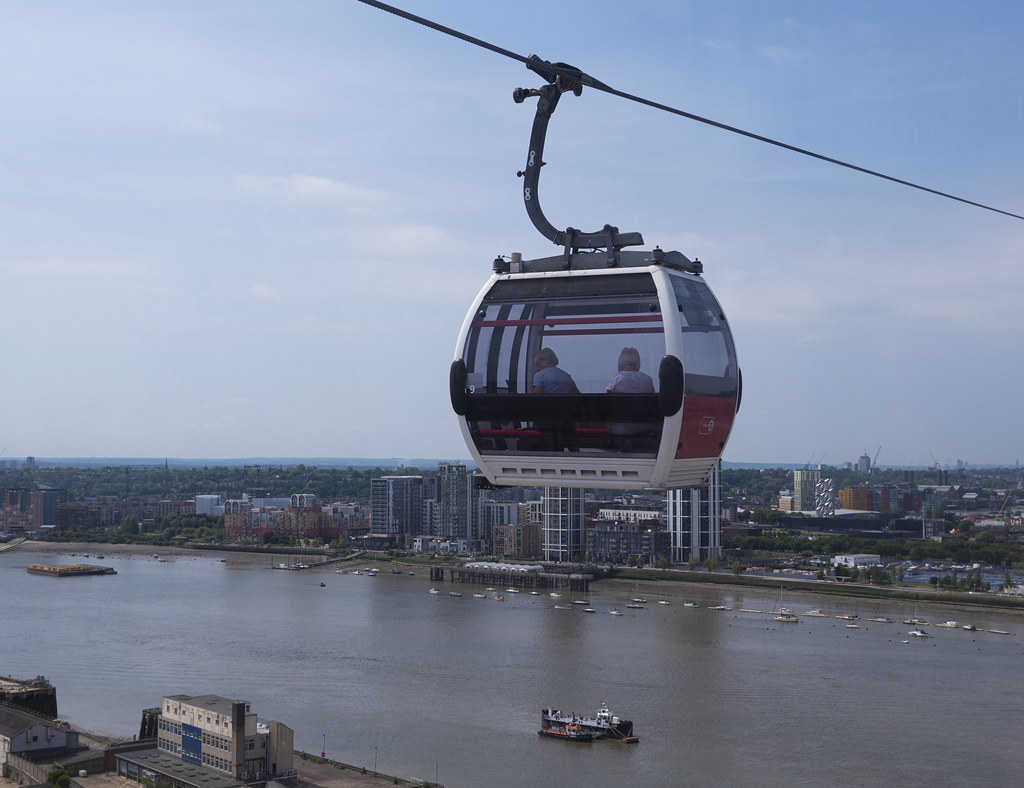
A; Most of the photographs about include overhead lines. They tend to be fairly inconspicuous. Systems that do away with them cost more and are non-standard.

Q: What about University Students?

A: The line would unfortunately remove direct access to the Universities. Students would have two main options:
1. Get off at the Karangahape Road stop, walk to Symonds Street and catch a bus further down Symonds Street.
2. Get off at Civic Stop and walk up the hill.

Share

Auckland Gondolas: Practical or a rope to nowhere?

With the cancelling of the SkyPath and the short-lived $800 million Pedestrian/Cycling bridge proposal it seems that the only options for the next harbour crossing will be a full scale tunnel or bridge.

However I came across the Youtube video where the author suggests a gondola crossing of Auckland Harbour. I did a bit of investigation myself and looked at some possible routes, the majority of which appear not to work but two might benefit from further investigation.

In the last decade urban gondola systems have become increasingly popular. They work well in difficult terrain such as steep hills, valley or river crossings. They are also relatively cheap which makes them popular in middle-income countries in the Americas.

The Medellin MetroCable in Columbia currently has 6 lines, most of these act as feeders from hill suburbs to Tram or Metro lines.

The Cablebús in Mexico City opened two lines in 2021 connecting low income transport-poor suburbs with metro stations.

Cablebús in Mexico City

Technology

The technology I am assuming is a Detachable Monocable Gondola with cars similar to the Emirates Air-Line in London, Medellin MetroCable and Mexican Cablebús.

Monocable means that there is a single moving cable. Detachable means that each car unhooks from the cable inside stations and moves slowly (or even stops) for easy boarding and unboarding. The general characteristics of these systems are:

  • 8-10 person cars ( able to carry bicycles, wheelchairs etc )
  • Speed around 20 km/h
  • Capacity 2500 people/hour in each direction.
  • Approx 1 car every 15 seconds.

Note that it is possible to increase capacity, for instance the new Medellin line P has a capacity of 4,000 people per hour in each direction.

Cars in Station ready for boarding

Options for routes

I have provided details about two possible routes:

  • Route One is a simple crossing of Auckland Harbour just east of the Auckland Harbour Bridge.
  • Route Two connects the CBD (near Elliot Street), the University of Auckland and Parnell.

Note that apart from at stations cable systems are along able to make very slight turns at each tower. I have pretty much assumed each line will be straight apart of at stations.

Route One – East of the Bridge.

The will start from a station near the current Ponsonby Cruising Club. A 50m mast 150m north, then a 700m span across the harbour to another 50m mast and then a station in the Stokes Point Reserve.

Total length is 1100m. Travel time around 5 minutes.

This route is a direct replacement of the Skypath. It would cater to cyclists and pedestrians needing to get between Stokes Point and Westhaven. The exact placement of the stations is flexible. The main difficulties are the height required to provide room for tall ships to pass underneath. The Emirates line has similar requirements to allow Thames river traffic and higher than usual towers.

Apart from some sightseers this line would mainly serve cyclists wishing to go directly between North Shore and the city. This Greater Auckland article shows the 2020 Skypath business case was estimating 4500 daily users for the Skypath a few years after it was built.

The high towers and steep climb on the Emirates Air-line

Route Two – Elliot Street to Parnell via Wellesley Street and the University

This would start with a station near the corner of Elliot Street and Wellesley Street West (possibly in front of Bledisloe House). The line would go east above Wellesley Street and over the Art Gallery, Albert Park and parts of the University to a station at the University (perhaps at the corner of Grafton Road and Symonds Street). The line would then go across Grafton Gully to a station at Parnell Train Station and then up the hill to terminate on Parnell Road. The total length is around 1700 metres.

The Elliot Street to Parnell route

There are 4 stations on this route.

  • Parnell Village (near 236 Parnell Road) is an employment & entertainment area.
  • Parnell Train Station is near Parnell and the University but down a hill from both and across busy roads from the University. It is within walking distance of the Auckland Museum.
  • The University is well served by Symonds Street buses but not by rail and is cut off from the CBD and Parnell.
  • The Elliot Street endpoint would be just 50 metres from both the Aotea Train Station and a proposed Queen Street light rail station near the Civic.
Starting Point and direction of Line to University / Parnell

The idea of this line is to cross the difficult terrain that separates Parnell, Parnell Station, the University and the CBD. There should be a lot of possible journeys between these four. It will expand the effective radius of Aotea Station, Parnell Station and a Civic light-rail station. It would also improve Parnell’s connectivity.

Cablebús line over a busy road

Travel times ( assuming 20km/h speed and 1 minute per station ) on the most likely journeys:

JourneyWalking DistanceWalking timeCable distanceGondola time
Elliot St to University800m11 min600m4 min
Elliot St to Parnell 2100m30 min1700m9 min
Parnell Station to Parnell400m6 min250m3 min
Parnell Station to University1400m20 min800m5 min

This line has the potential to be very busy. All the stops on the route would benefit from the improved inter-connectivity.

Two extensions to the line are possible. At the Parnell end the line could be extended down to a station located in the valley around St Georges Bay Road to serve the businesses (and housing) located around there.

Another possible extension of the line would be directly along Wellesley St West from Elliot Street to Victoria Park. I am unsure if traffic to/from the Victoria Park area would justify this however.

Other Routes

I had problems finding other routes that were suitable for gondolas. I’ve included a route to Birkenhead as an example of one that does not appear to be competitive with the existing bus as an example.

The majority of possible routes had various combinations of long distances (which take too long at 20km/h), low density/population at station catchment, already being covered by existing links and lack of obvious demand.

Westhaven to Birkenhead via Northcote Point and Marine Terrace.

This starts on the western side of the Harbour Bridge near a small Park/Bungy HQ. It goes over the harbour alongside the Bridge and has a station near “The Wharf”. The Line would then go across Little Shoal Bay to Little Shoal Bay Reserve. There would be a turning point there to go north-west over the gully of the Le Roys Bush Reserve to a station on the side of Birkenhead Avenue near the viewing platform.

Length 3.9km and end to end travel time of around 15 minutes.

The problem with this line is that Westhaven is not a good destination. Route One across the harbour fills a gap for cyclists but extending the line to Birkenhead doesn’t seem significantly improve the catchment (especially for non-cyclists).

Other possible routes I looked at

  • A simple crossing West of the Bridge
  • From the south-east of St Mary’s Bay to Stokes Point
  • From Wynyard Quarter to Stokes Point.
  • From St Mary’s Bay to Stokes Point and then the Akoranga Bus station
  • From Wellesley Street West to Stokes Point.
  • Between Devonport and the city
  • Above Lake Road from Devonport to Takapuna
  • Between Stokes Point and Bayswater
  • Between Akoranga Bus station and Devonport

Conclusion

Urban Gondolas do not work as a general solution to urban public transport but are suited to certain niche routes across difficult terrain.

Starting from the simple harbour crossing I looked at several cross harbour routes but most were unpromising due to lack of under-served destinations that could be easily connected. I ended up just keeping the basic harbour crossing to fill the gap for cyclists and walkers.

The Elliot Street to Parnell line on the other hand might be a good fit for a gondola. It is less than 2km long but connects 3 popular locations and an under-utilised train station.

Costs of gondolas are fairly low compared to other PT options. The two Cablebús lines in Mexico City are each around 10km long and cost $US 146m and $US 208m. Ballpark estimates might be between $NZ 100 million to $NZ 200 million for each route, hopefully closer to $100m.

Share

Moving my backups to restic

I’ve recently moved my home backups over to restic . I’m using restic to backup the /etc and /home folders and on all machines are my website files and databases. Media files are backed up separately.

I have around 220 Gigabytes of data, about half of that is photos.

My Home setup

I currently have 4 regularly-used physical machines at home: two desktops, one laptop and server. I also have a VPS hosted at Linode and a VM running on the home server. Everything is running Linux.

Existing Backup Setup

For at least 15 years I’ve been using rsnaphot for backup. rsnapshot works by keeping a local copy of the folders to be backed up. To update the local copy it uses rsync over ssh to pull down a copy from the remote machine. It then keeps multiple old versions of files by making a series of copies.

I’d end up with around 12 older versions of the filesystem (something like 5 daily, 4 weekly and 3 monthly) so I could recover files that had been deleted. To save space rsnapshot uses hard links so only one copy of a file is kept if the contents didn’t change.

I also backed up a copy to external hard drives regularly and kept one copy offsite.

The main problem with rsnapshot was it was a little clunky. It took a long time to run because it copied and deleted a lot of files every time it ran. It also is difficult to exclude folders from being backed up and it is also not compatible with any cloud based filesystems. It also requires ssh keys to login to remote machines as root.

Getting started with restic

I started playing around with restic after seeing some recommendations online. As a single binary with a few commands it seemed a little simpler than other solutions. It has a push model so needs to be on each machine and it will upload from there to the archive.

Restic supports around a dozen storage backends for repositories. These include local file system, sftp and Amazon S3. When you create an archive via “restic init” it creates a simple file structure for the repository in most backends:

You can then use simple commands like “restic backup /etc” to backup files to there. The restic documentation site makes things pretty easy to follow.

Restic automatically encrypts backups and each server needs a key to read/write to it’s backups. However any key can see all files in a repository even those belonging to other hosts.

Backup Strategy with Restic

I decided on the followup strategy for my backups:

  • Make a daily copy of /etc, /home and other files for each machine
  • Keep 5 daily and 3 weekly copies
  • Have one copy of data on Backblaze B2
  • Have another copy on my home server
  • Export the copies on the home server to external disk regularly

Backblaze B2 is very similar Amazon S3 and is supported directly by restic. It is however cheaper. Storage is 0.5 cents per gigabyte/month and downloads are 1 cent per gigabyte. In comparison AWS S3 One Zone Infrequent access charges 1 cent per gigabyte/month for storage and 9 cents per gigabyte for downloads.

WhatBackblaze B2 AWS S3
Store 250 GB per month$1.25$2.50
Download 250 GB$2.50$22.50

AWS S3 Glacier is cheaper for storage but hard to work with and retrieval costs would be even higher.

Backblaze B2 is less reliable than S3 (they had an outage when I was testing) but this isn’t a big problem when I’m using them just for backups.

Setting up Backblaze B2

To setup B2 I went to the website and created an account. I would advise putting in your credit card once you finish initial testing as it will not let you add more than 10GB of data without one.

I then created a private bucket and changed the bucket’s lifecycle settings to only keep the last version.

I decided that for security I would have each server use a separate restic repository. This means that I would use a bit of extra space since restic will only keep one copy of a file that is identical on most machines. I ended up using around 15% more.

For each machine I created an B2 application key and set it to have a namePrefix with the name of the machine. This means that each application key can only see files in it’s own folder

On each machine I installed restic and then created an /etc/restic folder. I then added the file b2_env:

export B2_ACCOUNT_ID=000xxxx
export B2_ACCOUNT_KEY=K000yyyy
export RESTIC_PASSWORD=abcdefghi
export RESTIC_REPOSITORY=b2:restic-bucket:/hostname

You can now just run “restic init” and it should create an empty repository, check via b2 to see.

I then had a simple script that runs:

source /etc/restic/b2_env

restic --limit-upload 2000 backup /home/simon --exclude-file /etc/restic/home_exclude

restic --limit-upload 2000 backup /etc /usr/local /var/lib /var/backups

restic --verbose --keep-last 5 --keep-daily 6 --keep-weekly 3 forget

The “source” command loads in the api key and passwords.

The restic backup lines do the actual backup. I have restricted my upload speed to 20 Megabits/second . The /etc/restic/home_exclude lists folders that shouldn’t be backed up. For this I have:

/home/simon/.cache
/home/simon/.config/Slack
/home/simon/.local/share/Trash
/home/simon/.dropbox-dist
/home/simon/Syncthing/audiobooks

as these are folders with regularly changing contents that I don’t need to backup.

The “restic forget” command removes older snapshots. I’m telling it to keep 6 daily copies and 3 weekly copies of my data, plus at least the most recent 5 no matter how old then are.

This command doesn’t actually free up the space taken up by the removed snapshots. I need to run the “restic prune” command for that. However according to this analysis the prune operation generates so many API calls and data transfers that the payback time on disk space saved can be months(!). So I only run the command approx once every 45 days. Here is the code for this:

prune_run() {
    echo "Running restic Prune"
    /usr/local/bin/restic prune --cleanup-cache --max-unused 20%
    echo " "
    touch /etc/restic/last_prune_b2
    echo "Updating restic if required"
    echo " "
    /usr/local/bin/restic self-update
}

prune_check() {
    if [[ ! -f /etc/restic/last_prune_b2 ]]; then
        touch -d "2 days ago" /etc/restic/last_prune_b2
    fi

    if [[ $(find /etc/restic/last_prune_b2 -mtime -30 -print) ]]; then
        echo "Last backup was less than 30 days ago so wont run prune"
        echo " "
    else
        echo "Chance of running prune is 1/30"
        RANDOM=$(date +%N | cut -b4-9)
        flip=$((1 + RANDOM %30))
        if [[ $flip  = 15 ]]; then
            prune_run
        fi
    fi
}

prune_check

Setting up sftp

As well as backing up to B2 I wanted to backup my data to my home server. In this case I decided to have a single repository shared by all the servers.

First of all I created a “restic” account on my server with a home of /home/restic. I then created a folder /media/backups/restic owned by the restic user.

I then followed this guide for sftp-only accounts to restrict the restic user. Relevant lines I changed were “Match User restic” and “ChrootDirectory /media/backups/restic”

On each host I also needed to run “cp /etc/ssh/ssh_host_rsa_key /root/.ssh/id_rsa ” and also add the host’s public ssh_key to /home/restic/.ssh/authorized_keys on the server.

Then it is just a case of creating a sftp_env file like in the b2 example above. Except this is a little shorter:

export RESTIC_REPOSITORY=sftp:restic@server.darkmere.gen.nz:shared
export RESTIC_PASSWORD=abcdefgh

For backing up my VPS I had to do another step since this couldn’t push files to my home. What I did was instead add a script that ran on the home server and used rsync to copy down folders from by VPS to local. I used rrsync to restrict this script.

Once I had a local folder I ran “restic –home vps-name backup /copy-of-folder” to backup over sftpd. The –host option made sure the backups were listed for the right machine.

Since the restic folder is just a bunch of files, I’m copying up it directly to external disk which I keep outside the house.

Parting Thoughts

I’m fairly happy with restic so far. I don’t have not run into too many problems or gotchas yet although if you are starting up I’d suggest testing with a small repository to get used to the commands etc.

I have copies of keys in my password manager for recovery.

There are a few things I still have to do including setup up some monitoring and also decide how often to run the prune operation.

Share

Sidewalk Delivery Robots: An Introduction to Technology and Vendors

At the start of 2011 Uber was in one city (San Francisco). Just 3 years later it was in hundreds of cities worldwide including Auckland and Wellington. Dockless Electric Scooters took only a year from their first launch to reach New Zealand. In both cases the quick rollout in cities left the public, competitors and regulators scrambling to adapt.

Delivery Robots could be the next major wave to rollout worldwide and disrupt existing industries. Like driverless cars these are being worked on by several companies but unlike driverless cars they are delivering real packages for real users in several cities already.

Note: I plan to cover other aspects of Sidewalk Delivery Robots including their impact of society in a followup article.

What are Delivery Robots?

Delivery Robots are driverless vehicles/drones that cover the last mile. They are loaded with a cargo and then will go to a final destination where they are unloaded by the customer.

Indoor Robots are designed to operate within a building. An example of these is The Keenon Peanut. These deliver items to guests in hotels or restaurants . They allow delivery companies to leave food and other items with the robot at the entrance/lobby of a building rather than going all the way to a customer’s room or apartment.

Keenon Peanut

Flying Delivery Drones are being tested by several companies. Wing which is owned by Google’s parent company Alphabet, is testing in Canberra, Australia. Amazon also had a product called Amazon Prime Air which appears to have been shelved.

Wing Flying Robot

The next size up are sidewalk delivery robots which I’ll be concentrating on in the article. Best known of these is Starship Technologies but there is also Kiwi and Amazon Scout. These are designed to drive at slow speeds on the footpaths rather than mix with cars and other vehicles on the road. They cross roads at standard crossings.

KiwiBot
Starship Delivery Robot
Amazon Scout

Finally some companies are rolling out Car sized Delivery Robots designed to drive on roads and mix with normal vehicles. The REV-1 from Reflection AI is at the smaller end with company videos showing it using both car and bike lanes. Larger is the Small-Car sized Nuro.

REV-1
Nuro

Sidewalk Delivery Robots

I’ll concentrate most on Sidewalk Delivery Robots in this article because I believe they are the most mature and likeliest to have an effect on society in the short term (next 2-10 years).

  • In-building bots are a fairly niche product that most people won’t interact with regularly.
  • Flying Drones are close to working but it it seems to be some time before they can function safely in a built-up environment and autonomously. Cargo capacity is currently limited in most models and larger units will bring new problems.
  • Car (or motorbike) sized bots have the same problems as driverless cars. They have to drive fast and be fully autonomous in all sorts of road conditions. No time to ask for human help, a vehicle on the road will at best block traffic or at potentially be involved in an accident. These stringent requirements mean widespread deployment is probably at least 10 years away.

Sidewalk bots are much further along in their evolution and they have simpler problems to solve.

  • A small vehicle that can carry a takeaway or small grocery order is buildable using today’s technology and not too expensive.
  • Footpaths exist most places they need to go.
  • Walking pace ( up to 6km/h ) is fast enough to be good enough even for hot food.
  • Ubiquitous wireless connectivity enables the robots to be controlled remotely if they cannot handle a situation automatically.
  • Everything unfolds slower on the sidewalk. If a sidewalk bot encounters a problem it can just slow to a stop and wait for remote help. If that process takes 20 seconds then it is usually no problem.

Starship Technologies

Starship are the best known vendor and most advanced vendor in the sector. They launched in 2015 and have a good publicity team.

In late 2019 Starship announced a major rollout to US university campuseswith their abundance of walking paths, well-defined boundaries, and smartphone-using, delivery-minded student bodies“. Campuses include The University of Mississippi and Bowling Green State University .

The push into college campuses was unluckily timed with many being closed in 2020 due to Covid-19. Starship has increased delivery areas outside of campus in some places to try and compensate. It has also seen a doubling of demand in Milton Keynes. However the company has laid of some workers in March 2020.

Kiwibot

Kiwibot

Kiwibot is one of the few other companies that has gone beyond the prototype stage to servicing actual customers. It is some way behind Starship with the robots being less autonomous and needing more onsite helpers.

  • Based in Columbia with a major deployment in Berkley, California around the UCB campus area
  • Robots cost $US 3,500 each
  • Smaller than Starship with just 1 cubic foot of capacity. Range and speed reportedly lower
  • Guided by remote control using way-points by operators in Medellín, Colombia. Each operator can control up to 3 bots.
  • On-site operators in Berkley maintain robots (and rescue them when they get stuck).
  • Some orders delivered wholly or partially by humans
  • Concentrating on the Restaurant delivery market
  • Costs for the Business
    • Lease/rent starts at $20/day per robot
    • Order capacity 6-18/day per Robot depending on demand & distance.
    • Order fees are $1.99/order with 1-4 Kiwibots leased
    • or $0.99/order if you have 5-10 Kiwibots leased
  • Website, Kiwibot Campus Vision Video , Kiwibot end-2019 post

An interesting feature is that Kiwibot publish their prices for businesses and provide a calculator with which you can calculate break-even points for robot delivery.

As with Starship, Kiwibot was hit by Covid19 closing College campuses. In July 2020 they announced a rollout in the city of San Jose, California in partnership with Shopify and Ordermark. The company is trying to pivot towards just building the robot infrastructure and partner with companies that already have that [marketplace] in mind. They are also trying to crowdfund for investment money.

Amazon Scout

Amazon Scout

Amazon are only slowly rolling out their Scout Robots. It is similar in appearance to the Starship Robots vehicle but is larger.

  • Announced in January 2019
  • Weight “about 100 pounds” (50 kg). No further specs available.
  • A video of the development team at Amazon
  • Initially delivering to Snohomish County, Washington near Amazon HQ
  • Added Irvine, California in August 2019 but still supervised by human
  • In July 2020 announced rollouts in Atlanta, Georgia and Franklin, Tennessee, but still “initially be accompanied by an Amazon Scout Ambassador”.

Other Companies

There are several other companies also working on Sidewalk Delivery Robots. The most advanced are Restaurant Delivery Company Postmates (now owned by Uber) has their own robot called Serve which is in early testing. Video of it on the street.

Several other companies have also announced projects. None appear to be near rolling out to live customers though.

Business Model and Markets

At present Starship and Kiwi are mainly targeting the restaurant deliver market against established players such as Uber Eats. Reasons for going for this market include

  • Established market, not something new
  • Short distances and small cargo
  • Customers unload produce quickly product so no waiting around
  • Charges by existing players quite high. Ballpark costs of $5 to the customer (plus a tip in some countries) and the restaurant also being charged 30% of the bill
  • Even with the high charges drivers end up making only around minimum wage.
  • The current business model is only just working. While customers find it convenient and the delivery cost reasonable, restaurants and drivers are struggling to make money.

Starship and Amazon are also targeting the general delivery market. This requires higher capacity and also customers may not be home when the vehicle arrives. However it may be the case that if vehicles are cheap enough they could just wait till the customer gets home.

Still more to cover

This article as just a quick introduction of the Sidewalk Delivery Robots out there. I hope to do a later post covering more including what the technology will mean for the delivery industry and for other sidewalk users as well as society in general.

Share

Passengers vs “50 Girls 50”

Spoilers: Minor for Passengers, Major for 50 Girls 50.

In late 2016 the movie “Passengers” came out staring Jennifer Lawrence and Chris Pratt. The movie is set aboard a sleeper spaceship and the plot centers around the two leads characters waking up early. I won’t say more about movie but there is summary of the plot in the wikipedia entry for the movie. You can compare it to the comic below to see the similarities and differences.

When I first saw the trailer it reminded me of a Sci-Fi comic I read years ago, others noticed it was similar and gave a name of the comic as “50 Girls 50” by Al Williamson. I couldn’t find a summary of  short story so I thought I’d write it up here.

50 Girls 50 by Al Williamson – Plot summary

The story is a 6 page comic with one off characters originally published in 1953. It is set in the distant future aboard a spaceship making humanity’s first journey to a nearby star. Since the trip will take 100 years the the crew/passengers of 50 women and 50 men (hence the title) will be frozen for the whole journey. However the freezing technology used only works on a person once, if you attempt to refreeze somebody they will die.

The plot of the story is partially told though flashbacks but I’ll tell it is chronological order.

The main character is Sid who before the voyage starts is attracted to one of the other passengers Wendy. Wendy notices his attraction and they get together. After a time Wendy has proposition for him. She suggest that Sid sabotage the Deep-freeze (D-F) units so that  he wakes up early. He can then wake her up and they can wake up the others one at a time and “make them our slaves”

Sid however as his own idea. What he wants to do is just have a series of girlfriends. He’ll set his clock for two years into the voyage. Then he will wake up Wendy and live with he for a while, when he gets tired of Wendy he will get rid of her and move to the next girl and so on.

Once the voyage starts things go to Sid’s plan. He thaws out 2 years in but instead of waking up Wendy he decided to thaw out Laura first. He then pretends to Laura that they both accidentally thawed out.

“Almost a year” later he gets tired and Laura, shoots her with a “Paralyzer” gun and stuffs her back in a Freeze-chamber to die.

He then prepares to wake Wendy. First he sets the Ships clock to say they will reach the destination in 3 years to give him enough time to get tired of Wendy. Things don’t go according to plan however when Wendy wakes up:

Not really a happy ending for anyone, although it is not like Sid or Wendy really deserved one.

Share

Reading the Lord of the Rings aloud

The reading project that I am working on is a re-read of the Lord of the Rings. I’ve read the book/trilogy around a The_Lord_of_the_Rings_Trilogydozen times over the years but the two main differences this time are that I am reading it aloud and that I am consulting a couple of commentaries as I go. The references works I am using are The Lord of the Rings: A Reader’s Companion and the The Lord of the Rings Reread series by Kate Nepveu. The Companion is a fairly large book (860 pages) that follows the text page by page and gives explanations for words, characters and the history/development of the text. These can range from a simple definition to a couple of pages on a specific topic or character. The reread has a quick synopsis at the start of the article for each chapter and then some commentary by Kate followed by some comments from her readers (which I usually only quickly skim).

I started my read-aloud on February 15th 2015 and I am now ( April 7th ) just past the half-way point ( I completed The Fellowship of the Ring on March 27th) . My process is to read the text for 30-60 minutes ( I’m reading the three-book 1979 3rd edition paperback edition, which amusingly has various errors that the Reader’s Companion points out as I go) which gets me though 5-10 pages. I read aloud everything on the page including chapter titles, songs, non-English words and footnotes. A few times I have checked the correct pronunciation of words ( Eomer is one ) but otherwise I try not to get distracted. Once I finish for the session I open the Reader’s Companion and check the entries for the pages I have just read and at the end of each chapter ( chapters are usually around 20-30 pages) I have a look at Kate’s blog entry. I try an read most days and sometimes do extras on weekends.

One thing I really need to say is that I really am enjoying the whole thing. I love the book (like I said I’ve read it over a dozen times) and reading it aloud makes the experience even better. The main difference is that I do not skip over words/sentences/paragraphs which tends to happen when I read normally. So I don’t miss phrases like the description of Lake Hithoel:

The sun, already long fallen from the noon, was shining in a windy sky. The pent waters spread out into a long oval lake, pale Nen Hithoel, fenced by steep grey hills whose sides were clad with trees. At the far southern end rose three peaks. The midmost stood somewhat forward from the others and sundered from them, an island in the waters, about which the flowing River flung pale shimmering arms. Distant but deep there came up on the wind a roaring sound like the roll of thunder heard far away.

LOTR_Readers_Companion
Nor do I skip the other little details that are easy to miss, like Grishnakh and his Mordor Orcs leaving the rest of the group for a couple of days on the plains of Rohan or the description of country leading up to the west gate of Moria. Although I do wish I’d seen the link to the map of Helm’s Deep halfway down this page before I’d read the chapter as it would have made things clearer. The Companion is also good at pointing out how things fit in the chronology, so when somebody gazes at the horizon and sees a cloud of smoke it will say what event elsewhere in the book (or other writing) that is from. You also get a great feel for Tolkien’s language and words and his vivid descriptions of scenes and landscape (often up to a page long) such the example above. Although I do find he uses “suddenly” an awful lot when he has new events/people break into the narrative.

The readers companion is a great resource, written by two serious Tolkien scholars but intended for general readers rather than academics. Kate Nepveu’s articles are also very useful in giving a more opinionated and subjective commentary. I would definitely recommend the experience to others who are fans of the Lord of the Rings. I’m not sure how well it would work with other books but certainly it enhances a work I already know well and love.

At the current rate I am expecting to finish some time in June or July. The next project I’m planning is Shakespeare’s plays. I am planning on reading each one (multiple times including possibly at least once aloud) and watching the BBC Television Shakespeare and other adaptations and commentaries. My plan is that I’ll cover the majority of them  but I’ll see how I go, However I’d like to at least get though the major ones.

Share